Category: DIY

She’s Crafty

I am going to be honest, I love those DIY/Home/Craft/Mommy blogs that have beautiful pictures of beautiful places. I, on the other hand, do not have one of those blogs. My pictures are taken with a cell phone – and not even and iPhone. My DIY projects are mediocre at best. I post sporadically with spelling errors. BUT I think most people who read my blog realize I am human and have a job and a kid and a life. So this counts as a disclaimer. I want to share my latest crafting adventure but without the beautiful DSLR photos or Pinterest worthy results. I am not going to let this stop me from sharing.

I found a cute, easy craft on Pinterest where you tape up a canvas, let your kiddo finger paint it, then remove the tape for a piece of ‘art’. I am trying to spruce our place up on a budget and thought this would be a fun way to do it. I turned out pretty cute!

Here’s what you need: 

  • Canvas – any size, shape, color, etc. Michael’s had a set of 3 on sale
  • Finger Paint 
  • Painter’s Tape
  • Bathtub – bonus points if you need to clean it anyway!
  • Cute kid – bonus points if he needs a bath anyway!

Here’s how I did it:

1. I turned on the Unauthorized Saved by the Bell movie from Lifetime, opened a bag of trail mix and popped the top on an Oktoberfest.

2. I thought it would be cute to have 3 canvases – one that says ‘Mom’ ‘heart’ ‘Dad’. S. and I could put it above our bed.

3. I started pulling off strips of painter’s tape and taping it on the table in the shape of the letters and the heart. It’s was a bit of a pain, but the booze and Lifetime movie helped.

4. The next day I stripped Mike down to his diaper and squirted a little finger paint on the canvas and let him go to town. It took some time, but he eventually figured it out. You really have to be okay with messiness. The bathtub helps contain it, but I am pretty sure I still have finger paint in my hair.

bathtub painting

5. I let the canvas’ dry while I hosed Mike and the bathtub down.

6. I pulled off the painter’s tape and ta-da! I think they turned out pretty well and it was fun too.

BEFOREAFTER

tada

Pinterest Gives Me a Tummyache

I’ve read a lot of about mommas (and daddies of course) who find social media stressful because of seeing other people’s perfect lives, even though we know life is far from perfect. Everyone is entitled to their opinion, but I can’t relate to that. I love social media for everything – business, personal and snooping.

Since I accepted a job offer that puts me in an office starting next Monday, my OCD is on overdrive. Much like the last week of pregnancy I have to clean the house, organize closets, have lunch with friends and do everything I said I would do during my three month unemployment and, frankly, didn’t. So I started by reorganizing my Pinterest boards. You know. Since that takes precedent over folding clothes.

images

I quickly found out, not that I am lacking in the motherhood department, but I missed the boat on so many opportunities for pictures, fun crafts that only a baby can ‘do’ and traditions to start. I had so many good intentions before Mike was born and I totally missed the boat. Do I think this makes me a bad mom? No, but I am a little disappointed. I can’t go back in time and redo all Mike’s monthly pictures to be super cute with blocks announcing his age. Or capturing his little hands in the shape of a heart on a frame for the perfect Valentine’s Day frame.

215821007112413307_xxgkfgfF_c

What did parents do before Pinterest? They walked blissfully through parenthood without a reminder of all the creative things they missed doing. I guess there is always hope for baby number two. But probably not.


Mike’s First Birthday Pool Partay

As a March baby I was always a little jealous of my friends with summer birthdays. They got to have cake by the pool while on my special day it was either the tail end of a freezing winter or an early start of a Mid Atlantic summer – with no pool in sight. This was the reason I timed Mike’s birthday for June. Just kidding, obviously didn’t time anything  to do with his arrival. But I was excited to have a June baby! Since he is a water lover it made sense to have a pool party to celebrate the big ONE.

My parents have a ‘bladder’ pool (is that what it’s called? That’s what we call it and it makes me cringe every time.) and a big backyard so they graciously let us host the party there. My Momma and I work SO well together. I am the brains and she is muscle, so that was a huge plus of us hosting at their house.

We were blessed with amazing weather and Mike was blessed with lots of family and fun. I am not sure he grasped what was going on, but the adults seemed to have a great time. Here’s a photo recap of Mike’s First Birthday Pool Party.

FinalInvite

I opted to use my PicMonkey subscription for good. I made these with a free background and printed them at our local Walgreens.

Mikey's 1st Bday Party (18)

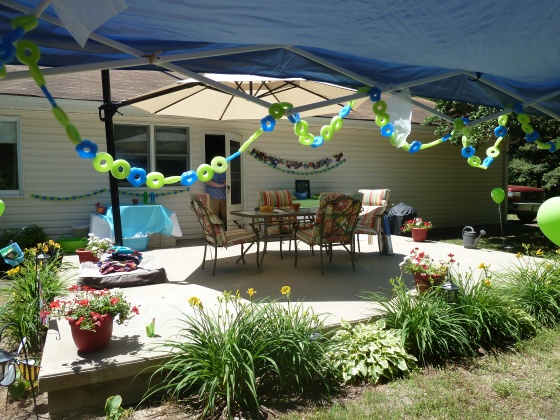
Remember the pool noodle garland tutorial I did? Well they turned out great and were hung randomly throughout the backyard. We had an ‘Easy Up’ tent in the backyard with some chairs and side tables for some extra seating in the shade.

Mikey's 1st Bday Party (22)

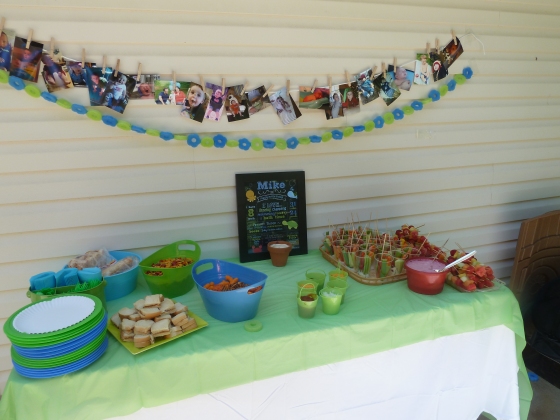
Since it was an afternoon party we didn’t have a real ‘meal’ planned. Who doesn’t love hot dogs though? We boiled some hot dogs and put out the fixings like onions, chili and cheese. My Mother in Law made fruit kabobs and S’s Aunt made veggie cups. For the kiddos – PB&J and Goldfish, but the adults might have had a couple. I didn’t get a good picture of it, but R. made an amazing jug of ‘Ocean Water’. A tip – don’t put the Swedish Fish in, they sink to the bottom and dead fish can kill the festive mood.

I hemmed and hawed trying to make my own chalkboard first birthday picture, but I finally realized it wasn’t worth the stress, so we found one on Etsy by Green Papaya Prints that we ordered and printed it locally. I would say my sanity is worth $20.

Mikey's 1st Bday Party (115)

I could kick myself for not getting a good picture of the cupcakes before they were devoured. Again, another $20 sanity saver – we had someone local make them with blue frosting. S. cut out a ‘shark fin’ to add to the top and they were adorable!

Mikey's 1st Bday Party (63)

The kids had fun in the kiddie pool.

Mikey's 1st Bday Party (154)

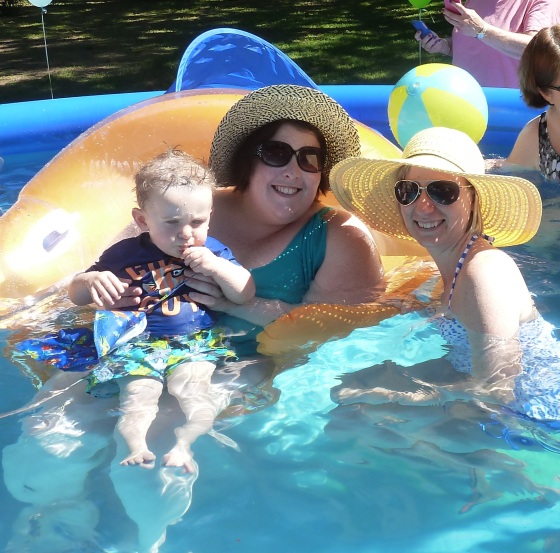
And everyone had fun in the big pool!

And here’s one last picture of the cute birthday boy.

Mikey's 1st Bday Party (84)

Mike’s birthday party was a lot of fun for everyone!


Pool Noodle Decorations

I can’t believe Mike is almost 1. I pretty much want to sing Sunrise Sunset daily. We are planning his pool party birthday party and since I’m unemployed I have copious amounts of time to surf Pinterest and tackle some DIY projects. I think I am going to tell people I quit my job JUST to plan my son’s first birthday. It sounds better than saying the job market sucks.

ANYWHO … I found the easiest, cheapest, cutest decoration I want to share with you. You know those bloggers who have fancy cameras that take professional looking pictures? And the crafting bloggers who have perfectly manicured nails and a fabulous backdrop?

Yeah. This ain’t that tutorial. Also, this is not my original idea and I am sure there are easier ways to do this, but you might think that my steps are easier. You know. For Muddling Mommas and Daddy-Os.

pool noodle garland


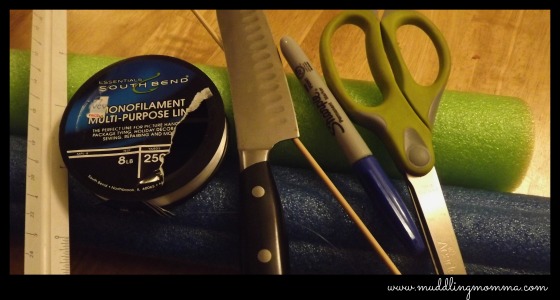
Here’s what you need:

  • Pool Noodles – I got ours at the Dollar Tree and they just happened to have one that looks like a flower. Score!
  • Fishing Line – Any weight will do
  • Sharp Knife – All of our’s are kinda dull, so I had to use a ridiculously large one.
  • Skewer – Or anything that is long and sharp. I was not about to drive around looking for a ‘long needle’
  • Ruler
  • Sharpie/Pen/Marker

6

Using the ruler and Sharpie mark off in 1/2 inch increments. I used 1/2 inch, but I am sure you can go thicker, but I envision anything thinner will be challenging in the next steps.

Slice the noodle on the marks – or close enough. This project is pretty forgiving when it comes to accurate measurements. It’s easy to do the cutting as if you are sawing, it shouldn’t take much effort. I tossed all the pieces into a basket, grabbed my fishing line and skewer and snuggled into bed.

5

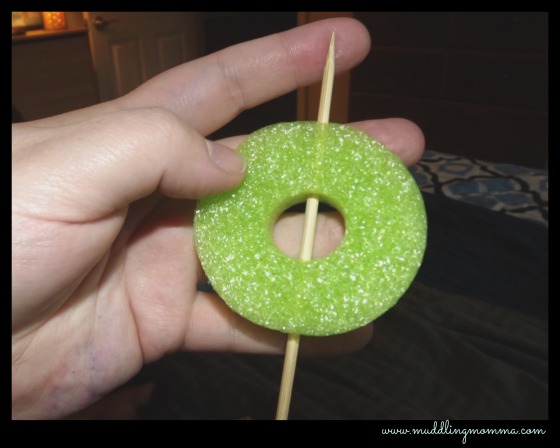
Now is a good time to start a movie or begin watching How I Met Your Mother from season 1 episode 1. Using the skewer, punch a hole on one end of a noodle slice and pull through. I am sure there are other productive ways to do this, but I punched holes in every slice then threaded them. You could possibly do the holes in one slice, then thread, then another slice, then thread. But my method worked for me.

3

Once they were all ‘holed’, I started threading the slices on my fishing line. I didn’t unroll and cut a piece of line, but it’s still way easy to get all tangled. I unspooled a bunch of line, then taped spool so it didn’t keep unrolling while I threaded. Make sense?

2

This is the tedious part, sometimes you will need to poke holes again. Just make sure the end of your line is straight because it tends to get kinked up and you have to cut it down.

1

Once you are done tie off the ends and cut the line. Ta-da! Instant cheap decorations ready for summer.  Stay tuned for a birthday party recap.


High Chair Chef: Baby Food Made Easy

highchairchef

I’m not going to lie, I had some guilt about not trying harder to work out our breastfeeding situation. Not because of the bonding and such, but because of the financial end of things. Formula ain’t cheap! And guess what, neither is baby food, which is why I decided to make my own. I’ve heard great things from non-hippie mommas about how easy it is and how much they are saving. Turns out 1 pouch of food is about $1 if you catch it on sale. Multiply that by, let’s say 4, which is a days worth of food – so $4 a day, multiply by 30 days in a month …. yikes.

I had a few books on how to make baby food and did my fair share of Googling and I had a really hard time finding something that really dummied it down for me. Through some trial and error, I think I’ve found my baby food makin’ groove.

tools

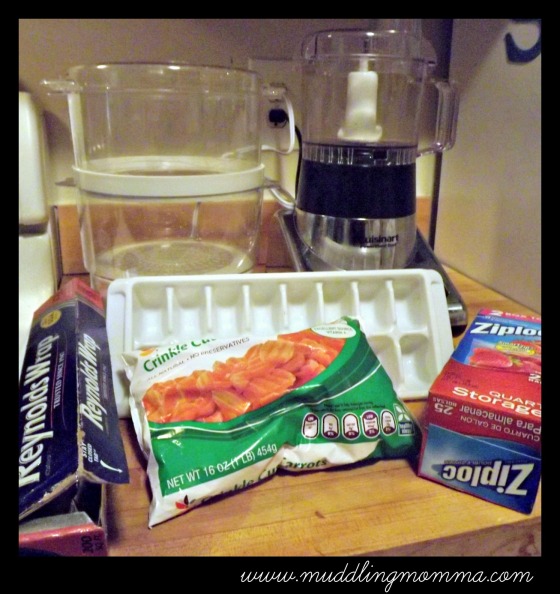
You really don’t need anything too fancy to get started. When we decided to make our own food, we researched some of the name brand, baby food specific kitchen gadgets and they seemed like regular products with the word ‘baby’ added and a higher price tag. Thankfully, we got a really nice Cuisinart food processor/blender for our wedding and it was just collecting dust.

When it comes to steaming, my Sister in Law uses the kind that goes into a pot, I opted to pick up an electric steamer for $20 at Walmart. To each his own!

steam

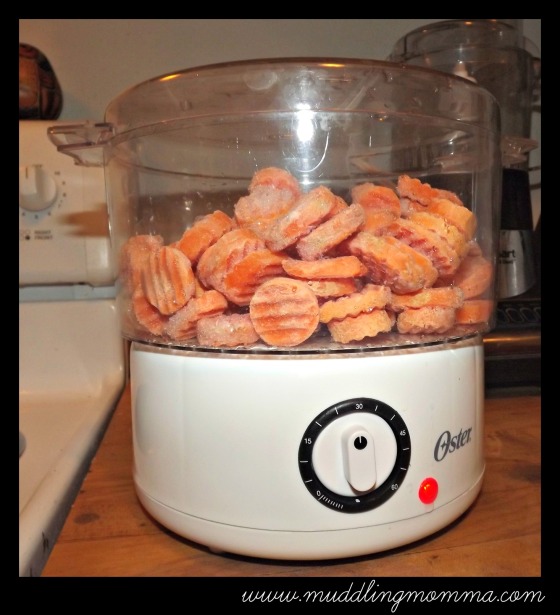
First, decide what’s on the menu. Tonight is carrots (even though we had a terrible experience a few weeks back after eating carrots)! I used a 1lb bag of frozen carrots that were on sale for 99 cents. They steam for about 20 minutes.

puree

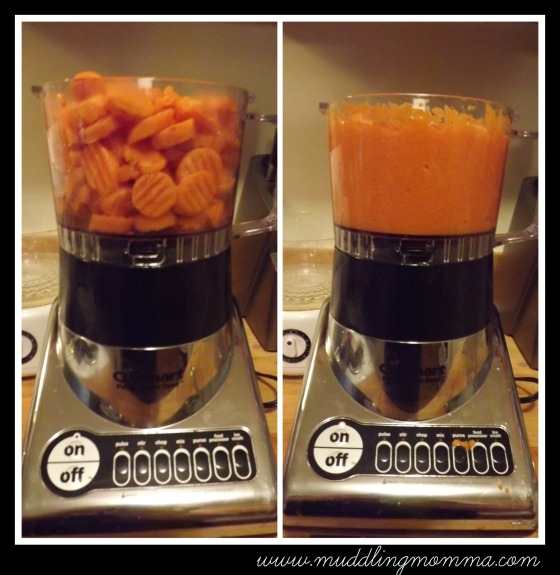
Next is the fun part – pureeing! Some foods are hard to get super smooth so I just add some water and it helps smooth it out a little bit. Otherwise, I try to give it to Mike to see if he likes the texture and if not, I thin it out with formula before he eats it.

cube tray

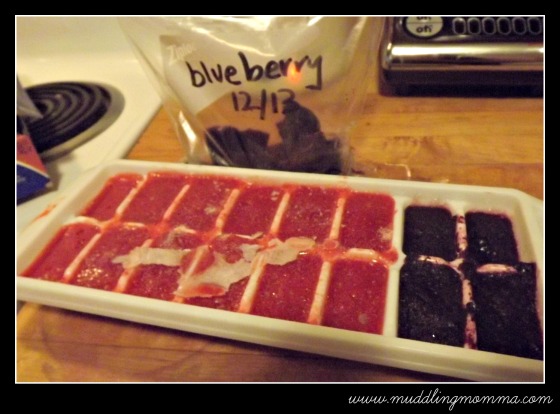
Once it’s done pureeing, spoon or pour it into ice cube trays (these are from the Dollar Tree), cover with foil and freeze overnight.

frozen

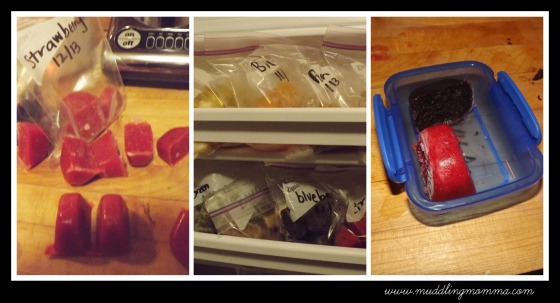
The next day, I pop out the cubes (this is strawberries and blueberries I made the night before) and put them in a Ziploc baggie with the food and the date it was made. Apparently the food can stay frozen for 3 months in the freezer, then thawed in the fridge (without formula added) for 3 days.

freezer

Every night, I pull out a variety of frozen food and put it in a plastic storage container to thaw in the fridge. My Mother in Law sent us a variety of types to try. I like the small OXO containers, but they tend to be pricey so we stick with the GladWare sauce containers.

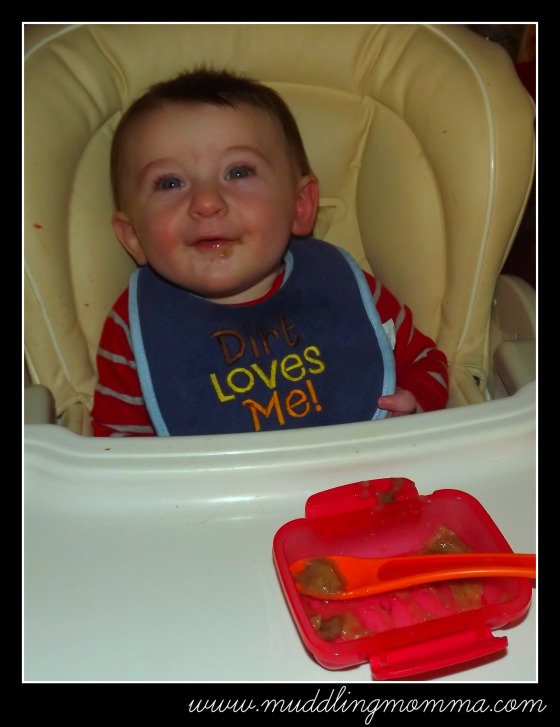
mike food

There you have it! Of course some foods, like apples and prunes, are a pain in the neck to make so we buy that food already made. But it is possible to save quite a bit of money and make healthy food for your kiddos.

Oh the Places You’ll Go

I can’t believe I never blogged about my Northern Virginia baby shower! I had it a few weeks ago, and one of my best friends, MS planned it. It. Was. Perfect. I love reading, and I hope Mikey does too – so it was a Dr. Seuss theme. If you are on Pinterest, get your ‘pin it’ button ready for some of these pictures. MS is so creative and thoughtful. Plus, we had a lot of fun! Here’s some highlights. 

Everyone signed a onsie for Mike with fun messages

Hop on Popcorn!

Favors

The happy host, we dressed Dr. Seuss style